Win condition
Currently the player can lose in the game –and they will have to start over again–, but there is no way for them to win.
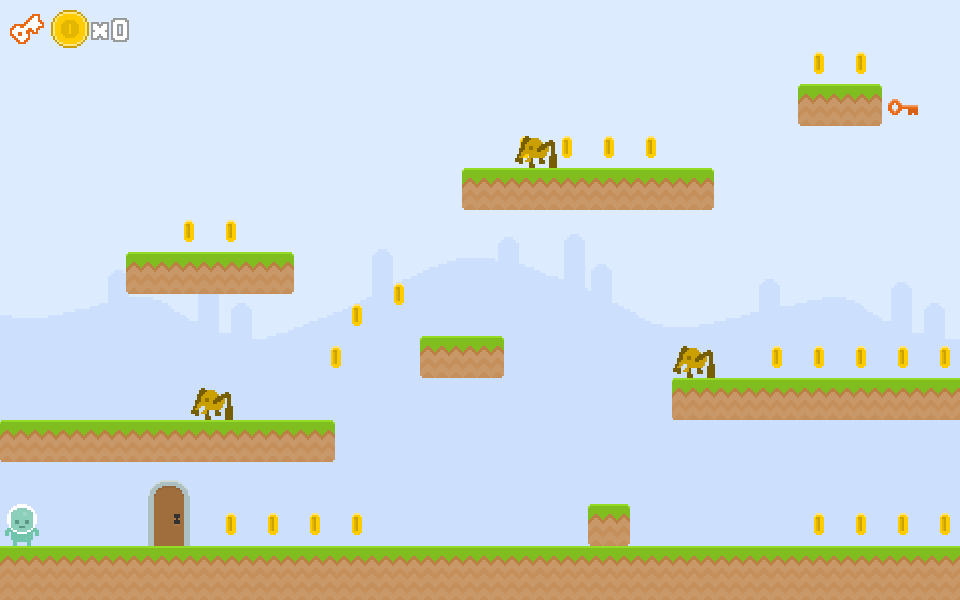
We are going to add two elements to the level: a door and a key. The goal of the game would be to fetch the key and then go back to the door and open it to advance to the next level. We will also add an icon next to the coin scoreboard to display whether the key has been picked up yet or not.
In the JSON file there is already the data of where the door and the key should be placed.
Here's how the whole thing will look like:

Tasks
Create the door
The door is a spritesheet (showing it closed and open):
 PlayState.preload = function () {
     // ...
     this.game.load.spritesheet('door', 'images/door.png', 42, 66);
 };
The door needs to appear below all the other sprites. We will be adding later some other elements that act as decoration (bushes, fences, flowers…) and need to appear at the back as well. For this, we will create a new group to store these kind of objects:
 PlayState._loadLevel = function (data) {
     this.bgDecoration = this.game.add.group();
     // ...
 };
Since this group is created before any other, the objects it contains will appear below the rest.
We will split the creation of the door and the key in separate functions. The door will be created within a new
PlayStatemethod,_spawnDoor:PlayState._spawnDoor = function (x, y) { this.door = this.bgDecoration.create(x, y, 'door'); this.door.anchor.setTo(0.5, 1); this.game.physics.enable(this.door); this.door.body.allowGravity = false; };Note that we have enabled physics in it. This is because we are going to detect if there is a collision between the door and the main character and see if the key has been already picked to trigger the win condition.
Now we just need to call that method from
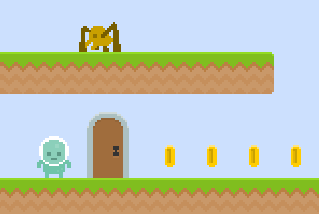
_loadLevel:PlayState._loadLevel = function (data) { // ... // after spawning the coins in this line: // data.coins.forEach(this._spawnCoin, this); this._spawnDoor(data.door.x, data.door.y); // ... };Load the game in the browser and see how the door has been created:

Create the key
The key is very similar to the door, but it just has a single image, not a spritesheet:
 LoadingState.preload = function () {
     // ...
     this.game.load.image('key', 'images/key.png');
 };
As with the door, we will have a separate new method to spawn the key:
 PlayState._spawnKey = function (x, y) {
     this.key = this.bgDecoration.create(x, y, 'key');
     this.key.anchor.set(0.5, 0.5);
     this.game.physics.enable(this.key);
     this.key.body.allowGravity = false;
 };
Since the key should also appear behind enemies and other sprites, we are adding it to the same group as the door.
And we call the
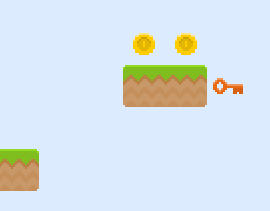
_spawnKeymethod just after having created the door:PlayState._loadLevel = function (data) { // ... // add it below the call to _spawnDoor // this._spawnDoor(data.door.x, data.door.y); this._spawnKey(data.key.x, data.key.y); // ... };Now you should be able to see the key at the top right region of the screen!

Implement the win condition
The win condition is touching the door once the character has picked up the key. We are going to store whether the key has been picked up or not in a flag, as a property of
PlayState:PlayState.init = function () { // ... this.hasKey = false; };The
hasKeyflag will be set totrueonce the key has been collected.To make sure the player understands that picking up the key is an important action, we are going to play a sound effect when this happens. So let's load its asset and create a
Phaser.Soundinstance for it. We are doing the same for the "open door" sound effect here as well.PlayState.preload = function () { // ... this.game.load.audio('sfx:key', 'audio/key.wav'); this.game.load.audio('sfx:door', 'audio/door.wav'); };PlayState.create = function () { this.sfx = { key: this.game.add.audio('sfx:key'), door: this.game.add.audio('sfx:door'), // ... }; // ... };We are going to collect the key in the same way that we collect the coins: call
overlapin the Arcade physics engine and then kill the key so it doesn't appear anymore. We will also play the sound effect, and sethasKeytotrue:PlayState._handleCollisions = function () { // ... this.game.physics.arcade.overlap(this.hero, this.key, this._onHeroVsKey, null, this) };PlayState._onHeroVsKey = function (hero, key) { this.sfx.key.play(); key.kill(); this.hasKey = true; };Play the game, fetch the key and notice how it disappears and the sound effect is playing.
We now have the first part of the win condition: fetching the key. Let's implement the final one: opening the door with it.
 PlayState._handleCollisions = function () {
     // ...
     this.game.physics.arcade.overlap(this.hero, this.door, this._onHeroVsDoor,
         // ignore if there is no key or the player is on air
         function (hero, door) {
             return this.hasKey && hero.body.touching.down;
         }, this);
 };
This time, we have made use of the filter function we can pass to
overlap. This is because we don't want the overlap test to pass if the player hasn't fetched the key yet or if the main character is jumping –it would be weird to open a key while jumping, right?The collision callback looks like this:
 PlayState._onHeroVsDoor = function (hero, door) {
     this.sfx.door.play();
     this.game.state.restart();
     // TODO: go to the next level instead
 };
For now, we are just playing a sound effect and restarting the level. Later on, we will implement level switching so the player can advance through all of them!
Try it! Play the level, fetch the key and then go back to the door. The level should restart and you should hear the door opening.
Spice-up the key…
Right now the key is very static. We don't have an animation in a spritesheet, but the key is an important object and should be highlighted somehow… we will do it by adding a movement animation, instead of a image-based one.
We can easily get this via Phaser.Tween instances. If you have worked with Flash or jQuery animations, tweens will be very familiar to you.
 PlayState._spawnKey = function (x, y) {
     // ...
     // add a small 'up & down' animation via a tween
     this.key.y -= 3;
     this.game.add.tween(this.key)
         .to({y: this.key.y + 6}, 800, Phaser.Easing.Sinusoidal.InOut)
         .yoyo(true)
         .loop()
         .start();
 };
The tween above will move the key up and down slightly, continuously. If you want more information about tweens, or want to tweak it, you can check out Phaser's documentation or the examples.
Load the game and you should be able to see the animation in place.

Add the key icon
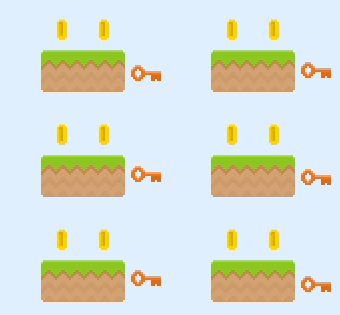
Last, we will add an icon next to the scoreboard to display if the key has been picked up. We will use a spritesheet for it:
 PlayState.preload = function () {
     // ...
     this.game.load.spritesheet('icon:key', 'images/key_icon.png', 34, 30);
 }
We will make an image in
_createHud:PlayState._createHud = function () { this.keyIcon = this.game.make.image(0, 19, 'icon:key'); this.keyIcon.anchor.set(0, 0.5); // ... this.hud.add(this.keyIcon); };Don't forget to move the scoreboard to the right to make room for the key icon! Change the spawning point of the coin icon:
 PlayState._createHud = function () {
     // ...
     // remove the previous let coinIcon = ... line and use this one instead
     let coinIcon = this.game.make.image(this.keyIcon.width + 7, 0, 'icon:coin');
     // ...
 };
If you load the game you will be able to see the icon!

Now we need to change the frame of the spritesheet depending on whether the key has been picked up or not. With sprites, we have used animations before to handle spritesheets, but since this is not an animation and we don't need to control the timing, we can just use the
frameproperty to select the frame index we want:PlayState.update = function () { // ... this.keyIcon.frame = this.hasKey ? 1 : 0; };Play the level again, pick up the key and… ta-da!

Checklist
- A door and a key appear in the level.
- If the main character picks up the key, it disappears and a sound effect is played.
- The level restarts when the main character gets to the door, having picked up the key.
- The level does not restart when the main character gets to the door when the key has not been collected.
- There is an icon at the top left part of the screen that indicates if the key has been picked up.
Download
Are you stuck? Take a look at the source code for this step.